ESXi HomeLab - Part 2 - pfSense Install
Prior Installation
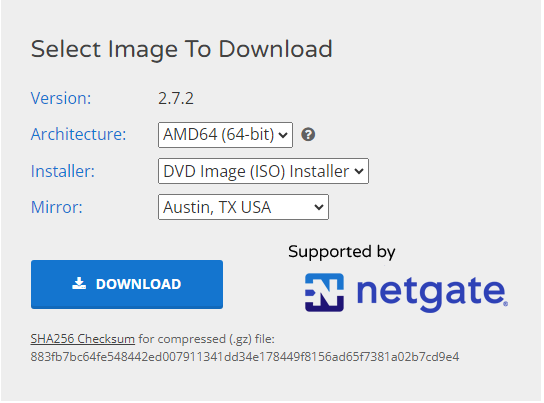
To begin, download the latest pfSense image using the link below:
https://www.pfsense.org/download/
Choose the following options and click download:
Upload the ISO to the ESXi Host.
pfSense VM Setup
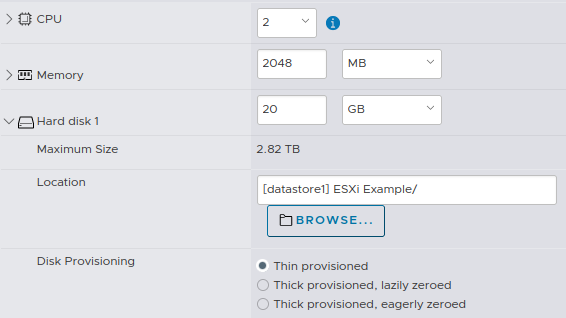
We will follow through with the same steps from ip3c4c's VMWare HomeLab to install pfSense.
CPU: 2
Memory: 2048 MB
Hard Disk 1: 20 GB, Thin provisioned (I like my VMs not to take up space they do not need).
And lastly add 4 more network adapters for the additional 4 port groups we created.

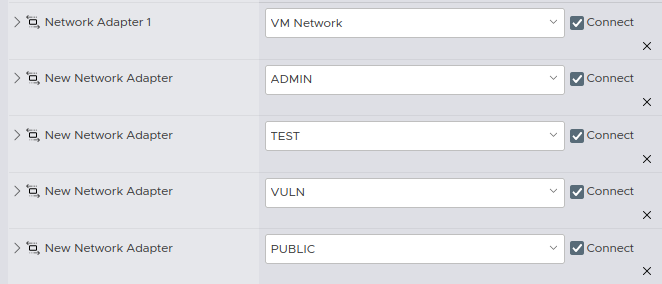
Select your ISO file as the CD/DVD Drive and finish creating the VM.
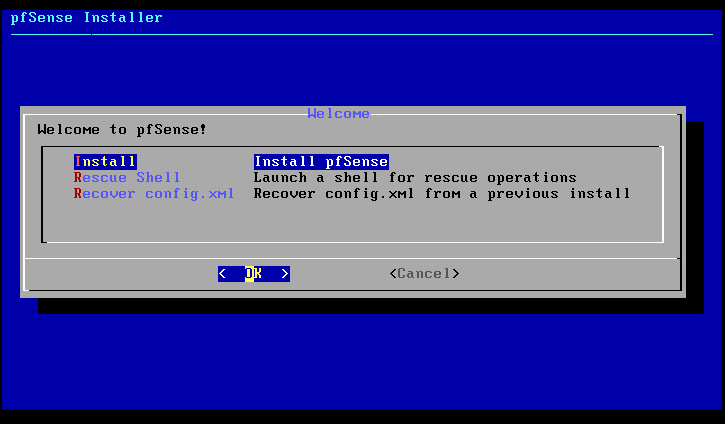
Begin pfSense Installation
Accept the Copyright and distribution notice and select Install.
Choose your desired keymapping and then partition your disk with Auto (UFS) BIOS.

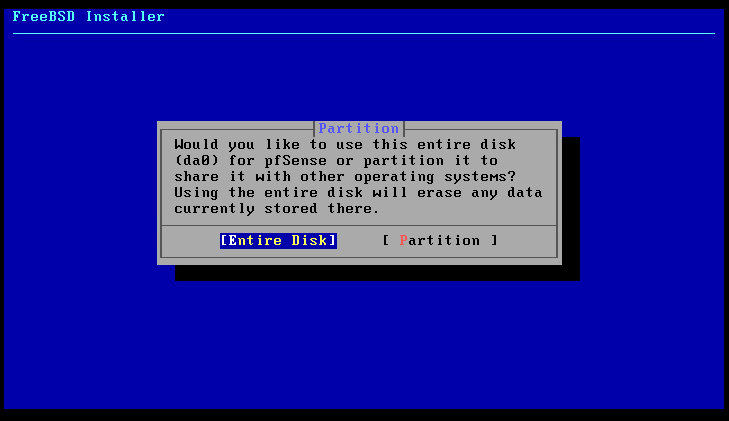
Select Entire Disk and continue with the installation.
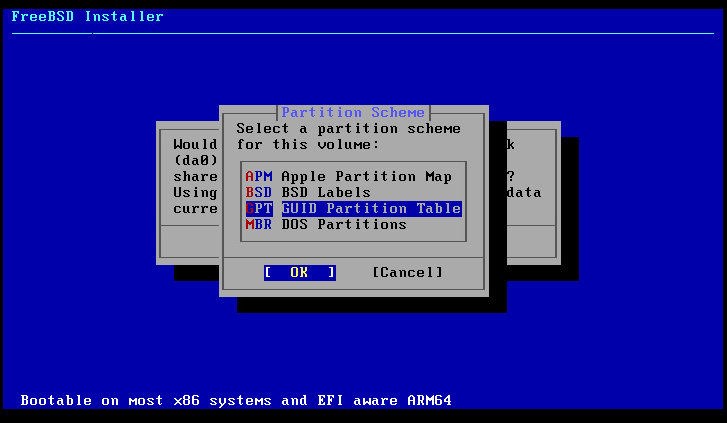
Select GPT as recommended by Netgate's Documentation and press OK.
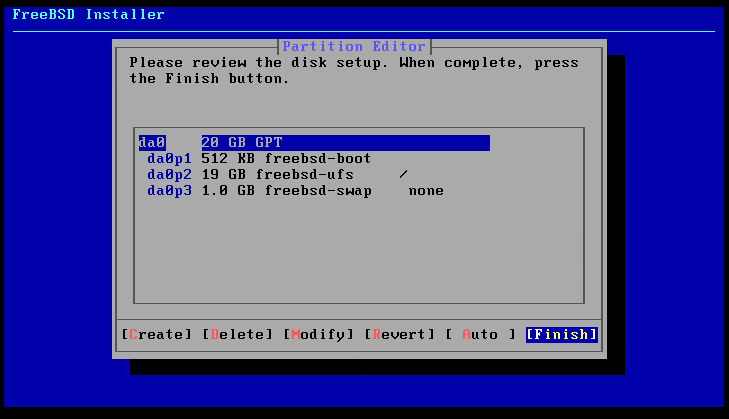
Finish and commit the installation.
Reboot the Machine.
Part 3 Here!
Now we move on to part 3 where we configure the interfaces on pfSense.
Here is Part 3.